Welcome to our DIY guide for patching and filling holes in plaster walls in the UK. Whether you’re experienced in DIY or just starting out, this guide will provide the tools and knowledge you need to transform your walls.
We’ll show you how to assess the damage, apply the correct patching compound and restore your walls to their former glory. So, roll up your sleeves and get ready to unleash your inner innovator.
Say goodbye to unsightly holes and hello to a flawless finish. Let’s dive into the world of DIY plaster wall repairs.
Assess the Size and Depth of the Holes
Now, take a step back and assess the size and depth of those pesky holes, ensuring you’re ready to tackle them head-on.
When it comes to mending large holes in plaster walls, it’s essential to understand the extent of the damage. For deep holes, you’ll need to follow specific instructions for repairing them properly.
Begin by measuring the size of the hole using a tape measure. If the hole is bigger than a golf ball, you’ll need to use a different technique than for smaller holes.
Then, find out the depth of the hole by lightly probing it with a screwdriver. This will help you gauge the amount of filler needed for a smooth finish.
Once you have assessed the size and depth, you can confidently proceed to gather the necessary tools and materials for your repair job.
Gather the Necessary Tools and Materials
First, make sure you have all the tools and materials you need to get started – you’ll be amazed at how satisfying it feels to transform those imperfections into a flawless finish. Here are the three essential items you’ll need:
- Plaster repair compound: Choose a high-quality compound that’s specifically designed for patching plaster walls. This’ll ensure a strong and durable repair.
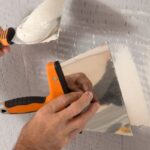
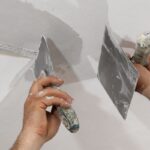
- Putty knife: A putty knife with a flexible blade is ideal for applying the plaster repair compound smoothly and evenly.
- Paint samples: Before applying the patch, it’s important to choose the right color that matches the existing wall. Collect some paint samples and try to blend the patch as closely as possible with the surrounding area.
To achieve a seamless blend with the existing wall color, try using different paint blending techniques, such as feathering and stippling. These techniques’ll help you achieve a natural transition between the patch and the surrounding wall.
Now, with the right tools and materials in hand, it’s time to prepare the surface for patching.
Prepare the Surface for Patching
To get started on preparing the surface for patching, gather some sandpaper and a damp cloth. Techniques for prepping are crucial for a smooth and flawless finish.
Use the sandpaper to gently sand the edges around the hole, creating a rough surface for the patching compound to adhere to. Wipe away any dust or debris with the damp cloth, ensuring a clean, dry surface. Avoid mistakes such as applying too much pressure or using a coarse sandpaper, as this can damage the plaster.
The surface is now prepped and ready, so it’s time to apply the patching compound and restore the plaster wall.
Apply the Patching Compound
Once prepped, you can start applying patching compound to restore your plaster wall, giving it a seamless appearance. Patching plays a key role in achieving a perfect finish.
There are four types of patching compounds commonly used in the UK:
- Ready-mixed: Ideal for small repairs and dries quickly.
- Setting-type: For larger holes, this hardens through a chemical reaction and offers great durability.
- Lightweight: Ideal for shallow dents or cracks, this is easy to apply and sands smoothly.
- All-purpose: Versatile for various patching needs and provides a strong repair.
Once applied, you can smooth and sand the area for a seamless finish.
Smooth and Sand the Patched Area
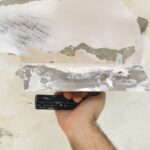
For a flawless finish, you’ll want to ensure you smooth and sand the patched area of your wall, creating a seamless blend that will impress.
Start by using a sanding block or sandpaper to even out any rough edges left by the patching compound. Move in a circular motion to avoid creating lines.
Choose the right grit for the job. Use a coarse grit (around 80 or 120) to remove excess compound, and then a finer grit (around 220 or 320) for a polished look.
Take your time and check the area often to make sure it’s smooth and even.
Once you’re satisfied, you can move on to priming and painting the wall, restoring it to its former glory.
Prime and Paint the Repaired Wall
It’s time to apply a coat of primer and give that mended wall a fresh look. Here are some tips for a smooth finish and choosing the right colour:
- Choose a paint colour to match your room’s decor. Consider the lighting and the desired atmosphere.
- Make sure the patched area is clean and dry before painting. Wipe away any dust or debris with a damp cloth.
Apply a high-quality primer to the mended wall to help the paint adhere evenly and provide a smooth finish.
When the primer is dry, paint with a roller or brush using even, overlapping strokes. Start from the top and work down.
By following these steps, you can achieve a flawless finish and transform your mended wall into a beautiful focal point of your room.
Frequently Asked Questions
Can I use the same patching compound for both small and large holes in plaster walls?
Yes, you can use the same patching compound for both small and large holes in plaster walls. There are various patching compound options available that are designed especially for plaster repair. These compounds are versatile and suitable for different sizes of holes.
However, if you’d prefer an alternative repair method, there are also other options such as using plaster of Paris or joint compound. These are effective for patching both small and large holes in plaster walls.
How long does it take for the patching compound to dry before I can sand it?
You’ll be amazed at how quickly the patching compound dries! In no time, it’ll be ready for sanding.
The drying time for the patching compound is incredibly efficient, meaning you won’t be delayed in moving on with your project. Once it has dried completely, you can sand it down to a smooth finish.
This innovative process ensures your plaster walls are repaired swiftly.
Can I use regular paint to prime and paint the repaired wall?
Yes, you can use regular paint to prime and paint the repaired wall. Make sure to choose a high-quality paint that’s suitable for plaster walls. Before painting, it’s important to prime the repaired area to ensure a smooth and even finish.
To match the color of the patched area with the rest of the wall, you can either use a color-matching service or try to blend the paint colors yourself.
Is it necessary to wear protective gear while working with patching compound?
It’s highly recommended to wear protective gear while working with patching compound. The importance of wearing the recommended safety equipment can’t be overemphasized. This includes safety goggles, a dust mask, and gloves.
Protective gear is essential in preventing any potential harm or accidents during the patching process. Wearing the appropriate gear will ensure your safety and reduce any associated risks of working with patching compound.
What should I do if the patched area does not blend in with the rest of the wall after priming and painting?
If the patched area doesn’t blend in after priming and painting, don’t worry, there are blending techniques you can try. First, feather the edges of the patch with sandpaper to create a smooth transition. Then, apply a thin layer of joint compound over the entire area, gradually tapering it out. Sand and repeat as necessary.
If you’re looking for alternative patching materials, consider self-adhesive mesh patches or setting-type joint compound for a more seamless finish.


