Are you ready to start your journey to artistic excellence? Discover the secrets of Venetian plastering in this step-by-step guide.
This centuries-old Italian art has captivated people around the world with its stunning beauty and elegance. Follow our instructions and you will learn how to apply multiple layers of plaster to achieve a smooth and polished finish.
We will take you through the history and significance of the art form before guiding you on how to prepare the walls, apply the base coat, and use the Venetian plaster. Plus, we will share expert tips and tricks for maintaining and repairing your walls for years of admiration.
Unleash your inner innovator and become a true connoisseur of Venetian plastering. Let’s get started!
Understanding the History and Significance of Venetian Plastering
It was the Venetians, however, who perfected the art in the Renaissance era. This involved applying multiple layers of plaster, polishing it to a smooth finish, and adding pigments for a vibrant and luxurious effect.
This influence is apparent in Venice’s grand palaces and churches, where the technique was used to create incredible works.
Now, before beginning Venetian plastering, we must ensure the walls are clean and smooth.
Preparing the Walls for Venetian Plastering
Before starting, make sure you adequately prepare the walls for a perfect Venetian plaster finish. Wall preparation is an essential step to achieve a professional-looking result.
Ensure the surface is clean and free from dust or debris. Use a damp cloth or sponge to remove any dirt or grime.
Inspect the walls for any cracks or flaws. Fill them in with a quality filler and level it out with a putty knife.
Once the walls are even, prime the surface. Apply a coat of primer to seal the walls and create a smooth base for the Venetian plaster. This’ll improve adhesion and prevent any uneven absorption of the plaster.
Now the walls are ready, you can apply the base coat and prepare the Venetian plaster.
Applying the Base Coat and Preparing the Venetian Plaster
Now that you’ve prepared the walls, it’s time to apply the base coat and get the Venetian plaster ready.
Have you ever wondered how this process will enhance the overall look of your walls? Let’s find out.
Start by applying the base coat evenly on the walls. This acts as a foundation for the Venetian plaster and ensures a smooth and durable finish. Follow the manufacturer’s instructions for the base coat application.
Next, mix the Venetian plaster. This is where the magic happens. By mixing the plaster with water, you create a creamy consistency that’s easy to apply. Use a paddle mixer or a drill with a mixing attachment to achieve a lump-free mixture.
The base coat is applied and the Venetian plaster is mixed, so you’re ready to move on to the next step of applying the Venetian plaster in layers. We’ll cover that in the next section.
Applying the Venetian Plaster in Layers
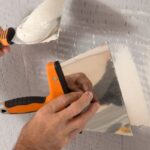
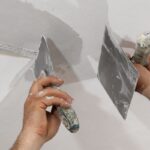
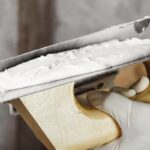
Once the base coat’s applied and the Venetian plaster’s mixed to a creamy consistency, it’s time to begin layering the plaster on the walls, creating a stunning and textured masterpiece. Applying the Venetian plaster in layers requires a combination of skill and technique. Start by using a trowel to apply a thin layer of plaster in a smooth and even motion, making sure to cover the entire surface area.
As you apply further layers, vary the direction and pressure to create depth and texture. If there are any issues, such as bubbles or unevenness, simply smooth them out with a trowel or sandpaper before applying the next layer. Allow each layer to dry completely before adding the next one.
With each layer, the beauty of the Venetian plaster will become more prominent, bringing your walls to life. To achieve a smooth and polished finish, the next step is honing the plaster.
Achieving a Smooth and Polished Finish
To achieve a smooth and polished finish, it’s essential to carefully hone the layers of Venetian plaster, transforming your walls into a mirror-like reflection of elegance and sophistication. Here’s how to achieve seamless transitions and troubleshoot common issues:
- Begin by sanding each layer of plaster with fine-grit sandpaper, ensuring a smooth surface with no imperfections.
- Use a damp sponge to lightly dampen the surface before applying each layer, allowing for better adhesion and avoiding premature drying.
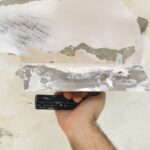
- Apply the plaster in thin, even coats, using a stainless steel trowel. Level out any uneven areas or air bubbles as you go.
- Before applying subsequent layers, let each layer dry completely and lightly sand it again. This helps create a seamless transition between layers.
- If you encounter any cracks or uneven spots, use a putty knife to gently remove the imperfection and reapply a thin layer of plaster.
By following these steps, you’ll achieve a flawless, polished finish that will enhance the aesthetic appeal of your space.
In the next section, we’ll explore tips and tricks for maintaining and repairing Venetian plaster walls, ensuring their longevity and beauty.
Tips and Tricks for Maintaining and Repairing Venetian Plaster Walls
Here’s a helpful tip for maintaining the beauty of your Venetian plaster walls: regular dusting and wiping with a soft cloth can keep them looking polished and elegant.
If you notice any small cracks or chips, use a fine-grit sandpaper to smooth out the area, then apply a small amount of plaster to fill in the gap. Once it’s dry, sand and polish the repaired area to blend it in.
To tackle stubborn stains, try using a mild soap and water solution. Test any cleaning products in an inconspicuous spot before applying them to the whole wall.
With these maintenance techniques and troubleshooting common issues, your Venetian plaster walls can remain a stunning focal point.
Frequently Asked Questions
How long does it take for Venetian plaster to dry completely?
Venetian plaster typically takes 24 to 48 hours to dry completely. However, multiple factors can affect the drying time. Applying thin, even layers allows for quicker drying.
Humidity, temperature, and ventilation can all influence the drying time. For best results, use thin layers and take these factors into account.
Can Venetian plaster be applied on any type of wall surface?
Venetian plaster can be applied to many wall surfaces, including drywall, concrete, wood, and pre-painted walls. It’s essential to consider the advantages and disadvantages of each one.
Drywall provides a smooth, even finish, while concrete is highly durable. Wood surfaces bring warmth and character, but may need extra preparation.
Before applying Venetian plaster, make sure the wall is clean, smooth, and free from any loose paint or debris. Fill any cracks and sand the surface for optimum adhesion.
Is Venetian plaster suitable for both interior and exterior walls?
Venetian plaster is a versatile choice for both interior and exterior walls. It’s exquisite finish adds a touch of elegance to any space, captivating your senses like a work of art. However, there are pros and cons to consider.
Whilst it offers durability and resistance to moisture, it may not be suitable for all wall surfaces. Comparatively, its longevity varies depending on the type of wall. For those seeking innovative design options, Venetian plaster is a detail-oriented, precise choice that brings innovation to both indoor and outdoor spaces.
Can Venetian plaster be used in high-moisture areas such as bathrooms or kitchens?
Venetian plaster can be used in high-moisture areas such as bathrooms and kitchens, but it’s important to weigh up the pros and cons. It offers a luxurious and unique finish, however, it can be more vulnerable to water damage than other materials. To ensure its longevity in these areas, ensure good ventilation, limit moisture, and mop up any spills quickly. Regular inspections and reapplying a protective sealant can also help.
How do you repair a damaged spot on a Venetian plaster wall?
To repair a damaged spot on a Venetian plaster wall, start by preparing the area. Remove any loose or damaged plaster and clean the surface.
Next, apply a thin layer of plaster with a trowel, seamlessly blending it with the surrounding texture. Allow it to dry, then gently sand the area for a smooth finish.
Common causes of damage include impact, moisture, or incorrect application. With these repair techniques, you can restore your Venetian plaster wall to its original beauty.


